Saturday, September 22, 2012

That overwhelming feeling

Lately, I've been feeling overwhelmed. I'm not sure why, but when it happens, it takes a toll on my body. Today I'm feeling under the weather. Something similar happened back in June when I was under some stress as well.

This time however, I feel like my 'stress' is more self-inflicted. I don't need to feel stressed, but I am. Here's why (I think):

  • I've been fighting allergies for a while now. Despite my previous attempts to quell them, they are still sometimes there, it's getting really tiring. I'm now waiting to get in to see an allergist. However, my family doctor's 'favourite allergist' also happens to be the busiest one in town, she tells me. Great. I get to wait months. In the mean time, I'm loading up with lots of natural sources of antihistamines, including quercetin and vitamin C and hope that it quells the symptoms somewhat.

  • School is back in session and despite my greatest efforts, I feel behind already. I know I'm really not, but I feel like I should be further ahead in my readings. 

  • Weekends are too short. To get everything I want to do done has become an impossibility. Before I know it, it's always Sunday night. This weekend I've made a list of what I'd like to accomplish, but now I don't know where to start! 

I know I need order to stay stress-free. I feel my life is lacking some of that order right now and I find it hard to deal with. Or maybe I just need to find an organization project, because often that does the trick.

But I can't just sit here and write about how stressed I'm feeling without doing something about it. So, let's just git'er done! I know if I can get through most of my list I'll feel a lot better. I'm also taking on another challenge starting Monday. The ever fabulous Fab Detox, put on by the very lovely Meghan Telpner. The last time I took part in this detox, I felt the best I have in a while. I'm hoping to get similiar results this time around, but preparation is going to be key! I need to get my kitchen in order! My very top priority for Sunday -- groceries and meal prep! That's how to eat well and stay sane -- it's all about preparation. And I can do it.

So let's forget about feeling sorry for ourselves and get our bums moving -- because it's going to be great. Better if my nose would stop running... but conquering the list, will conquer the stress, and hopefully conquer the nasal leakage!

I feel better already.

Speaking of feeling better, my family was blessed with a beautiful addition this week. Evan William Perry entered the world at 9:30 p.m. in Edmonton on Sunday evening. He's a doll. I love him and I've not yet met him. His cute as a button face now occupies the home screen on my phone. And whenever I feel I need to smile, I reach for my phone and I look at his most perfect face: his bright blue eyes (who I see a lot of my brother and dad in), his little smirk, his wee ears and his hand in a fist looking ready for a punch and I can't help but smile. True love, I tell you, true love.

Monday, September 3, 2012

I'm back... summer recap and a recipe!

Well hello there... it's been a while. Apparently I decided to take the summer off from blogging. Oops. Let's recap:

The first two weeks July were spent at my favourite place in the world... my real home on Prince Edward Island. The weather was spectacular and we had great fun with my family (immediate and extended) and friends. Lots of time at the cottage, beach walks, seafood, bonfires, wine -- everything needed to recharge the batteries after a couple of very busy months!


Arrived in time for Canada Day fireworks in Summerside!
Just waiting for it to get dark.

My mom and I hosted a baby shower for my sister-in-law.
This was one of my contributions for it.

Oh Charlottetown, you're so quaint and lovely.

Ah wine, I love thee.

Cottage life demands bonfires. Every. Night.

Love North Cape! Colours are always spectacular.
The tide was coming in on the reef.

The next couple weeks, I can't really remember what we did, but lots of taking in the sunshine here in Ottawa. Which finally lead to early August, when my other half had a pretty serious surgery -- a total knee replacement. That unfortunately put a bit of a damper on plans for August as we were mostly house bound. However, I still felt like I had a good restful summer despite being the sole cook and cleaner, not to mention ice getter, pill pusher, and all-round "fetcher" of too many things to count. On the one hand, having this surgery so young is a bit of an anomaly, on the other hand, I think his recovery might be going better than the norm. Blessings!

Since I've left you for so long, I've got a treat to share with you! There is a serious abundance of zucchini at my house, and I didn't even grow any in my little garden. Between our produce deliveries and my farmers' market outings, I've got a fridge full! And I don't really care for sauteed or roasted zucchini! So what to do? Make lots and lots of raw zucchini noodles! And baked goods. Yummy baked goods. I give you my gluten-free and vegan zucchini muffins!


Zucchini Muffins
Gluten-free, dairy-free, egg-free, refined sugar-free
Yields 12 muffins
Adapted from Florida Coastal Cooking


Ingredients
2 chia eggs (2 tbsp chia seeds + 6 tbsp water)
1/2 cup coconut oil
1/3 c maple syrup
1 cup shredded zucchini (tightly packed)
1 tsp vanilla
1 tsp cinnamon
1 cup brown rice flour
1/2 cup buckwheat flour
1/2 tsp baking powder
1/2 tsp baking soda
1/2 tsp sea salt

Directions
1. Preheat oven to 350F.  Mix the chia eggs and set aside for about 5 minutes. Mix the coconut oil, maple syrup, zucchini and vanilla in a medium bowl; add chia eggs once set. Stir in cinnamon, flours, baking powder, baking soda and sea salt; mix until wet and ingredients are just combined.

2. Spoon batter into muffin tins lined with liners, or oiled with a bit of coconut oil. Bake for 18 minutes or until browned and a toothpick comes out clean.

Enjoy the bounty of the season!

Friday, June 29, 2012

Spreading nutrition love in the workplace!

So for the past month or so, a colleague and I have been putting on a series of four mini-workshops on health and wellness for our co-workers. I've been presenting on nutrition and my colleague did presentations on stretching and different yoga poses to counteract our sedentary cubicle lifestyle.

At my superfoods workshop
My topics were:
  • Superfoods
  • Stress-buster foods and supplements
  • Power breakfasts and starting the day off right
  • Eating for energy and avoiding the 3 p.m. crash

It's been truly a fantastic experience and for me highlights the fact that I've chosen the right career path. I find it so interesting how nervous I can get about presenting the simplest thing at work (related to my current job), yet presenting about nutrition, something I can speak to passionately, doesn't ruffle a single feather.

It's been such a great experience for all involved -- presenters and participants. I had people coming up to me in the days following the superfoods talk telling me that they went out and bought hemp hearts. I felt like a very proud mom!

We plan to do more similar sessions in the fall. Looking forward to spreading more nutrition love to the workplace!

Tuesday, June 19, 2012

My urban garden

The long weekend in May turned into backyard reno weekend at my place. And I couldn't be more pleased! We (meaning a little me, but mostly my handy and awesome Dad along with his trusty assistant, the bf), got some power tools out and went to work.

More on the bigger renos later, because I still have a bit more work to do for it to be finished – I just have to find the time, which seems to be at a premium these days. But for now, a glimpse at a smaller part of the reno - vegetable gardens!

I've been wanting to do this forever! But now I have a little urban garden all of my own. I didn't go too crazy to start, planting just a few things that I know we'll gobble up without issue.
  • green onions
  • carrots
  • lettuce
  • spinach
  • red/yellow peppers
  • tomatoes
I also planted a few herbs. Other than the rosemary, which I bought from a local nursery, I wasn't organized enough to start them indoors, so we'll see how they do.
  • rosemary
  • cilantro
  • basil
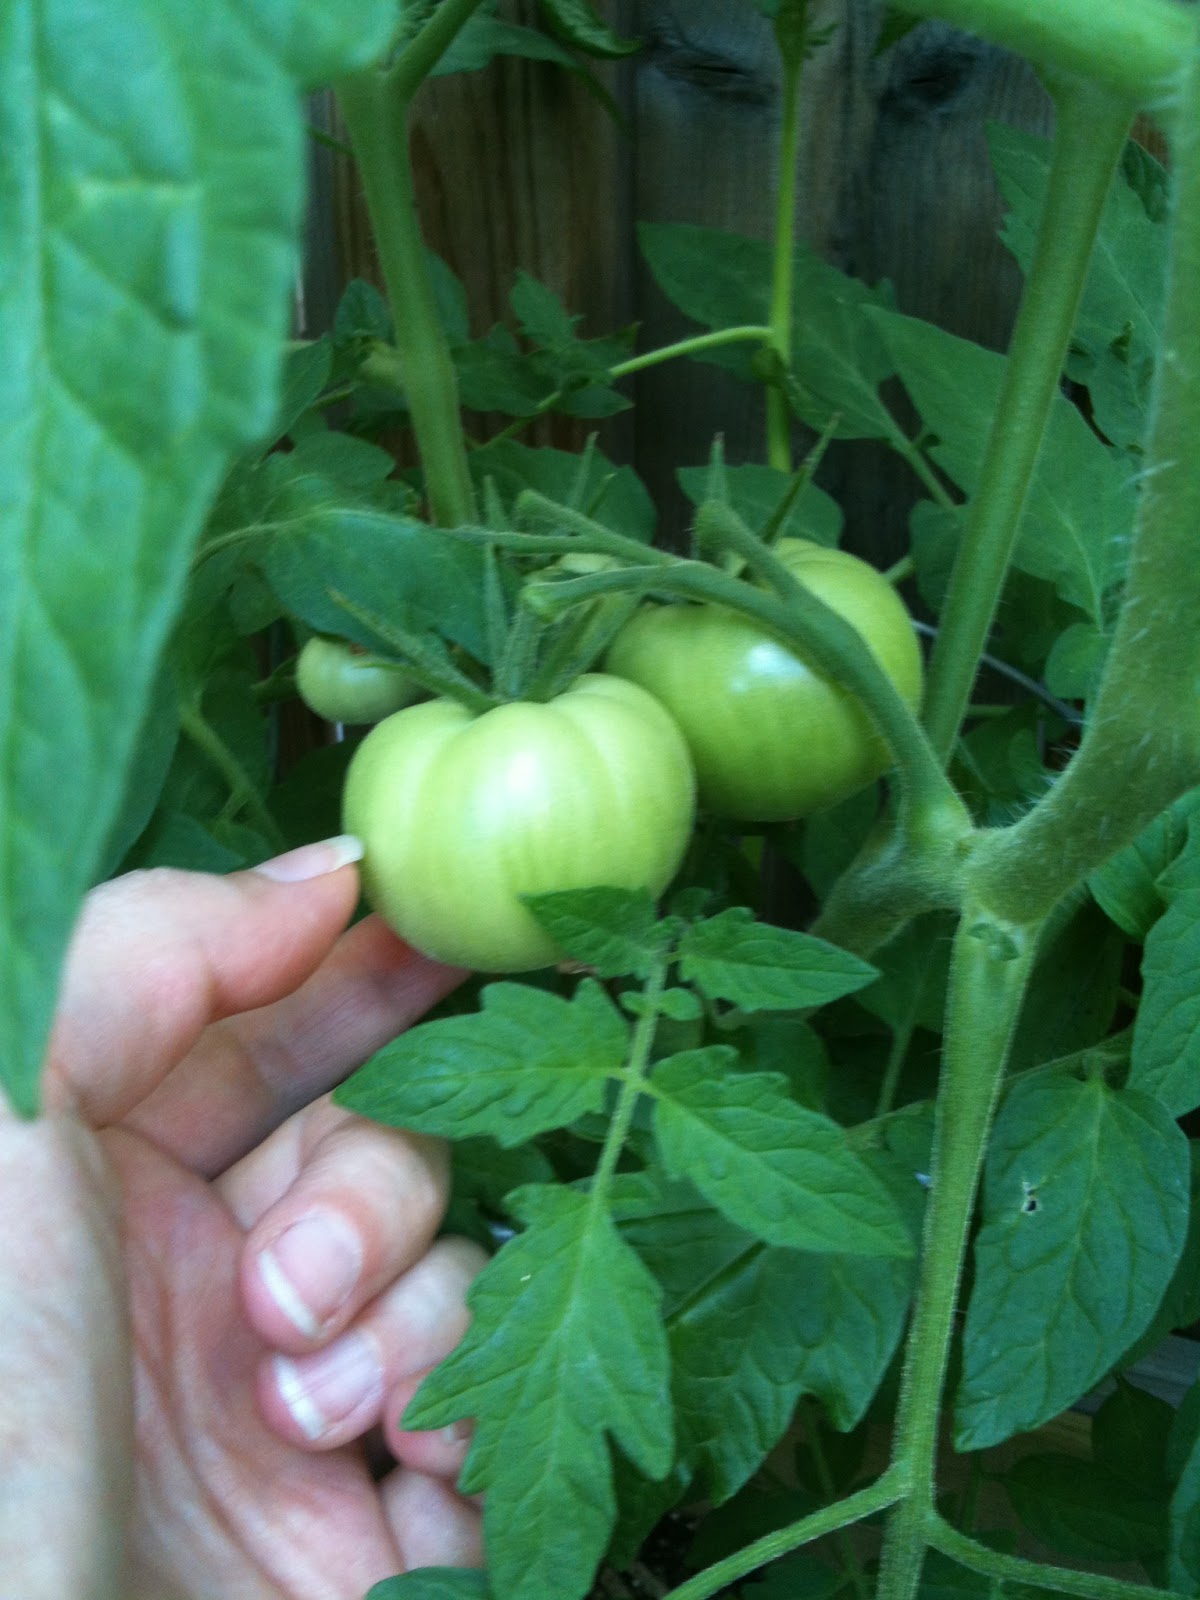
So everything came up except for the carrots. I think our friendly neighbourhood squirrels might have gotten to them... The most promising are my tomato plants! Wow. I bought them at a nursery so they were already a few inches tall, but they have just taken off! Tomatoes on the vine already!

Here's a little picture tour. Enjoy!

Mighty tomato plants

Tomatoes!

Cherry tomatoes

Basil! May need some thinning out...

Cilantro and Rosemary

My now lone pepper plant, the other broke (wind/animal?) and died :( Also spinach!

Leaf lettuce! Pretty sparse... I think something's been eating it too!

A few green onions showing themselves

So vegetable gardening is not easy. Things don't always turn out like you imagine them -- all lush and beautiful. But I'm pretty happy with how my first summer is going. I plan to replant the carrots soon and maybe put up a bit of chicken wire to perhaps discourage hungry animals.

Sunday, June 17, 2012

Refreshing strawberry lemonade

I don't want to brag, and maybe I should knock on some hard wood, but the weather in my part of the country has been oh so lovely recently. Today, after running some errands and doing a few chores, I was a bit of a sweaty mess and ready for some hydration!

I wanted to incorporate some beautiful and yummy strawberries that were lurking in my refrigerator and nothing is better than lemonade on a hot day!

I give you my strawberry lemonade. It makes two servings, so share with a friend! Or do what I did, and just have two glasses!


Ingredients:
  • Juice of one lemon
  • 3/4 cup of hulled strawberries
  • 1 to 2 tbsp coconut syrup or other sweetener of choice (to taste)
  • 2 cups of sparkling water or non-carbonated filtered water
Instructions:
  • Place lemon juice, strawberries and coconut syrup into blender and blend strawberries are pureed.
  • Add water to blender and pulse a few times to combine.
  • Pour into glasses and enjoy!
This drink is HIGHLY enjoyable accompanied by a good book and a patio... just sayin'.

On a somewhat related note, please read what this Coke executive had to say about Coca-Cola. And then hopefully you will ask yourself, "is she freaking serious!?!?". Feel free to discuss below!

Wednesday, June 6, 2012

Before you take your doctor's advice, read the ingredients!

Source
Recently my mother had some dental surgery. Prior to the procedure, I was talking to her on the phone and she told me she had just been out grocery shopping to get some things to eat following the surgery. She mentioned the dentist told her to get some "Boost" – a meal replacement drink.

I was appalled. I asked her on the phone to read me the ingredients.

I ask you now, what in this list of crap is nutritional?

Water, corn syrup solids, sugar, modified milk ingredients, canola oil, high oleic sunflower oil, corn oil, artificial flavour, salt, soy lecithin, carrageenan, artificial colour, soy oil, (may contain potassium hydroxide and hydrochloric acid), minerals (calcium carbonate, calcium phosphate tribasic, chromic chloride, cupric sulfate, ferric pyrophosphate, magnesium phosphate dibasic, manganese sulfate, potassium chloride, potassium citrate, potassium iodide, sodium citrate, sodium molybdate, sodium selenite and zinc sulfate), vitamins (biotin, calcium d-pantothenate, dl-α-tocopheryl acetate, folic acid, niacinamide, pyridoxine hydrochloride, riboflavin, sodium ascorbate, thiamine hydrochloride, vitamin A palmitate, vitamin B12 and vitamin D3). 

From what I can tell, you've got the following:
  • water
  • sugar
  • sugar
  • modified milk ingredients, as defined by the Canadian Food Inspection Agency: any of the following in liquid, concentrated, dry, frozen or reconstituted form, namely, calcium-reduced skim milk (obtained by the ion-exchange process), casein, caseinates, cultured milk products, milk serum proteins, ultrafiltered milk, whey, whey butter, whey cream and any other component of milk the chemical state of which has been altered from that in which it is found in milk (Source)
  • a bunch of oils, from most likely genetically-modified sources
  • artificial flavour, as defined by the Canadian Food Inspection Agency: one or more substances prepared for their flavouring properties and derived in whole or in part from components obtained by chemical synthesis (Source)
  • some very processed thickening agents
  • artificial colour, this shouldn't be news to anyone... they are chemicals 
  • a bunch of added mineral and vitamins that are poor sources and often a type that our body cannot readily absorb (calcium carbonate, for instance is a poor calcium supplement choice, we absorb very little calcium from this source)

Feel free to help a nutritionista-in-training and point out the REAL FOOD, and therefore nutrition...

Still looking... thought you might.

Instead of Boost, here's my suggestion: easy, fresh, cheap, and is full of REAL nutrition.

  • 2 cups water
  • 2 tbsp hemp hearts
  • large handful of greens (spinach, kale, chard)
  • 1 cup of mixed berries
  • 1 frozen banana
  • BLEND this goodness up and then DRINK this goodness up

Feel free to take it to the next level and add more nutritious superfoods using my two go-to smoothie recipes here and here.

Enjoy and be well!

Sunday, June 3, 2012

DIY Spice Rack 2.0

Spice jars have been my enemy for a while... but I think I have it under control! At long last!

I enjoy organization. A great deal. I love the satisfaction it gives me. Messy spice bottles and little plastic bags in the back of a cupboard does not give me satisfaction. So when I saw this photo on Pinterest months ago, I got a little excited. Mainly because it incorporated my love for mason jars in a very cool way.


So I went to the hardware store and the craft store and got my supplies. And well that attempt turned into this...


So going on a tip from a reader, I headed over to Lee Valley and got some super duper magnets. They held the jars, but unless you were very gentle at pulling them off and putting them back on the wall, you'd end up with a minimum of six jars crashing onto the counter top. Not fun. Insert a few curse words here.

I decided to abandon this great Pinterest idea. Let's face it, DIY projects don't always work out as planned.

And yes, yes, I know those little spice jars with the magnets on the back exist already. But they are expensive. And not as original and pretty as my little mason jars.

Insert this. My handy-dandy drawing of what will become the new spice holding device -- thanks to some input from my handyman-dad and a coworker.


Off to the hardware store once again (thank goodness neither project was that expensive!) to get a pine board, some 'L' hooks and some drywall wall anchors. Roughly fifteen bucks later, I'm ready to get to work!

I started with a 1 x 6 piece of pine, when milled is actually 11/16" x 5 1/2". I needed about 10ft for my project, so I got one piece 6 ft long and had it cut down the length of the board at the store (for free, I might add), so I ended up with two 6 ft boards roughly 3/4" x 2 3/4". Perfect width for my little project.

I measured out all the lengths required (two 13 3/4" sides and four 20" shelves and got to work cutting them using my mitre box saw. Handy little thing to have around (thanks Dad!). And yes, I just got to work in the middle of my dining room! Hardwood floor + deluxe vacuum = easy saw dust clean up!


Once that was done, a good sanding was in order. I like to do this with a sponge sander. I find it easier to get a smooth finish.


I marked where all the shelves would go as well as where the screws would go. I then pre-drilled all the holes and followed that with screws to secure the structure. Forgot to take a photo at this stage, but this photo shows how I attached the screws via the sides.


Once it was all together, I applied a bit of wood filler where some of the boards met. In a few cases there was just a little tiny space where the boards didn't come completely together. This was easily fixed with a putty knife and wood filler.

Then one last sanding to smooth out where I applied the wood filler and all over for good measure. A quick cleaning and then I was off to paint! Using some left over paint from my kitchen walls (read: leftover paint costs $0). I applied 2 light coats with a sponge brush. I got great coverage after only one coat, seen here:


After the second coat of paint has dried for a day or so, it's ready to be mounted to the wall! Simply attached four of the "L" brackets to the rack.

Mark the wall where all the screws will go and insert wall anchors into the wall. Then attach the the spice rack! Ta Daaaa!


When I made my first spice rack with the magnets (version 1.0 and 1.1), I had made little labels for the jars. But I took this to the next level as well... I recently came across Martha Stewart's Avery line of products available at Staples and well fell in love... Here's how I re-labeled my spices. So pretty... You won't be able to see the labels when the jars are on the shelves, but in my organizing ways, I arranged them all alphabetically, so I have a idea based on that plus their colour/texture from the clear jar of what each jar contains. The label just confirms!


Hopefully (fingers and toes crossed), there won't be a Spice Rack 3.0 in my future.


Love!

(Apologies for blurry/grainy photos, been meaning to take new ones for a month now... but haven't done so, and now it's dark again and well if I take some now they'll turn out the same. This blog is finally going to see the light of day, blurry or not!)